New Texas 200 Video.
Thursday, July 6, 2017
New Video!
New Texas 200 Video.
Sunday, June 4, 2017
A little Maintenance and Reloading
It 's time again for the Texas 200. It's one week away. A little maintenance and a couple of modifications are in order. This year I have some extra special equipment and a lot more knowledge about movie making. The doc will be bigger and better! Time to reload and do it again.
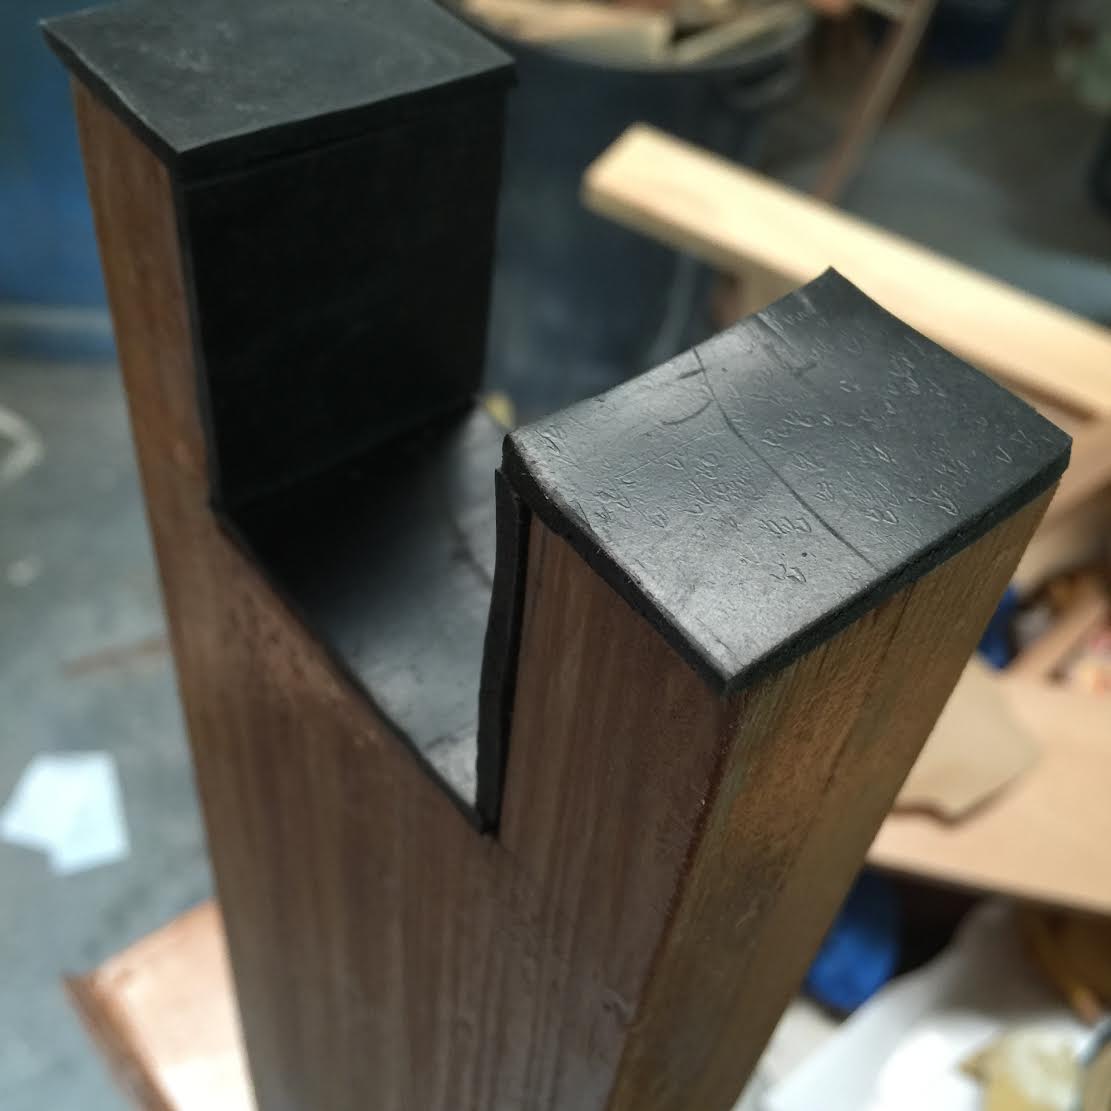
As far as modifications go, both of them involve the steering. The design of the tiller always seemed a little odd to me. It has no lock on being pulled out of the tiller. It is really not a big deal under normal sailing but it could be pulled out in situations when things get awkward. To remedy the problem I made a pin out of cocobolo (because it was on the shelf) and drilled a hole where it could be inserted as a stop.
The other steering modification was to the pintles. Pintles are the pin part of the hinge on the rudder. The pintle is inserted into the dungeons. Anyway, as these pins had broken in they had become a bit looser. Nothing but gravity and friction keeps these pins down. During last year's 200 there was some wave action that would push the rudder up and occasionally I would have to pound on the top of the rudder to get it back seated all the way down. After a couple of days my hand was getting sore. To fix the problem I drilled a hole in the pintle and put a ring through the hole with a washer on top for good measure.
Other items to tend to were general wooden boat things. In other words, refinishing and cleaning. I didn't take any before pictures because it was embarrassingly nasty and should have never gotten that bad. Good news is things really cleaned up nice. The rub rails did need refinishing and they came out looking nice.
When I get back, the boat is going into the shop (with the AC) for a complete overhaul and get her back to new condition. Working outside is a drag. She is too good of a boat to be neglected.

Pintles and dungeons. Sounds like a game the nerdy kids play. There is now a hole through the exposed area of the pin with a ring through it.


Installed.

Rub rail sanded and ready for finish.

Finish applied.
Wednesday, June 22, 2016
Completed my first Documentary!
Check out the Doc I just finished about the Texas 200.
https://youtu.be/EwAEeIBHr38
The name of the documentary is "Two Hundred Miles in a 15 Foot boat". Just put that in the youtube search engine if the link does not work. Thanks for viewing!
https://youtu.be/EwAEeIBHr38
The name of the documentary is "Two Hundred Miles in a 15 Foot boat". Just put that in the youtube search engine if the link does not work. Thanks for viewing!
Monday, April 18, 2016
Another Project!
Another project. Ok I'll admit I am delaying having to work on the trailer...I can't stand working on trailers, but this one is important.


I have found that anytime a passenger goes for a ride he or she always wants to sit or stand in the companionway. They usually end up standing because sitting on the threshold of the companionway is not comfortable for very long (like about 30 seconds). Many of the pocketship builders have built seats that ease the pain of the plywood edge.
I wanted to make something small and easy to store, strong yet lightweight. After a bit of head scratching I came up with some that seems like it is going to work. I will be taking a passenger in the upcoming Texas 200 and it will get a good field test before I spend a lot of time on the paint and finish. Originally I had planed to put a couple of drink holders in the top, and still might do it, but I am up to six drink holders all ready. You would think this is a Dodge Caravan.


Saturday, April 9, 2016
If Blogging was not Enough...
I have a pretty good background in photography that goes back to the days of film. I know its hard to tell from these blog pictures that are all taken with my cell phone, but I really do. I promise.
With this background I have decided to get into video. I figure the only thing really interesting enough to video and download to youtube would be something to do with my Pocketship. There are really fun to watch videos on Youtube with beautiful young couples on 30 to forty foot yachts. The obvious video project for me would be documenting the Texas 200. Kind of a grimy version of the same thing without the hot chicks.
I figured that I really need practice shooting video and learning the editing program. I have noticed on the videos of Pocketships on youtube have not shown any interior shots. With the boat in the shop I figured that was a good place to start. I shot some footage (do they still call it that?) and put together a little three minute video of a tour of Candy-O.
I'll keep shooting and editing some little projects until the Texas 200 starts in 65 days. I figure that will be enough time to become the Ken Burns of sailing videos.
Jury Duty Again!
Just before I started Candy-O I had jury duty. I got in and out fairly quickly for Nueces County. Then the Feds called me in for their version of jury duty. That time I got picked and served on a jury for about a week. I had a short mention of it interrupting my boat building progress in an earlier blog entry. I was called in again by the county but got out of it because I just served on the federal jury. About six weeks ago I got called in by the county again. Yep, picked again and served 2 weeks on a jury for an attempted murder of two policemen plus a stolen vehicle and drug charge. It was pretty high profile. Lots of news media. Well just as I get progress going on the boat getting ready for the Texas 200 again this year the municipal court sends me a jury summons. I really hate to complain because I truly feel obligated and feel good about doing my civic duties, but come on!
For those of you scoring at home, that's five in the last year.
I get called in usually an average of once or twice a year and don't get picked. I had a Cal Ripken like streak of not getting picked. The streak went on for years and years. Then there were the last two times...I am pretty sure I can get out of this latest one pretty quickly after serving so recently. I go in Monday.
Don't the courts know I am working on a boat?!!
Sunday, March 27, 2016
100 Days Until the Texas 200!
For the past few weeks I have been finishing Candy-O. That's right, finishing. Last year at this time I was determined to make it to the Texas 200, a 200 mile cruise up the Texas coast starting at almost Mexico going up the Texas coast 200 miles. At the halfway point in where I live (Corpus Christi). I accomplished my goal of having Candy-O ready for the 200 and had her in the water one week before the Texas 200 start. Mission accomplished!
After a bit of a rough start things really smoothed out and I was off and sailing. The copious amount of new things I learn was like drinking from a fire hydrant. I really only had the sailing skills of a 12 year old, because the last time I had sailed solo on a sailboat I was 12. On the upside, I did a lot of sailing when I was 12! The sailing came back to me like riding a bike.
In the mornings of the Texas 200, the winds were light. The distances of the legs were long and the combination of the two made for very long days. Seat cushions could have gone a long way in making the second day much more enjoyable. There were other things like a tiller extension that also would have added comfort. I found sleeping in the boat was nice with the memory foam mattress topper I picked up at Walmart just before the start. The problem I had was in the middle of the night the mosquito netting I had taped up in the companion way feel down. I had a few hungry visitors with me before the nigh was over. I am building some screens into a spare set of drop boards, I also purchased a DC powered fan.
An outboard motor would have been nice. The outboard would not only aid in getting into and out of some of the tight harbors but would aid in safety if something in the rigging broke or I got caught in a bad current with unfavorable winds thing could figuratively go south in a hurry.
I did a really good job on a lot of things for the Texas 200. It is amazing what you can learn from the internet in preparation for such an event. I had pretty much everything I needed, and went overboard (pun intended) on a bunch of stuff I didn't need. I am still finding things I packed and didn't need, or forgot I had. This year I can be more methodical with my cargo.
After the Texas 200 I took out Candy-O in some fairly stiff winds and found some spots on the boat that need attention. The sail track on the mast is screwed on with screws every 3 or four inches. I used 1/2" screw into the soft sitka spruce mast material. The screws began to pull out...not good. Also the guy wires seemed loose. The turn buckles I was using were bottomed out and could not be tightened any more. Gotta fix that! It was a good thing I bailed out at the halfway point before I would have found these problems in the middle of nowhere.
It has been nice having Candy-O back in the Pocketship Yard. I really enjoy working on her and dreaming of not just making it to the Texas 200 but finishing the 200 in comfort.
Tuesday, July 21, 2015
The Mad Rush
To make the Texas 200 I went into overdrive to finish the boat in the six weeks leading up to the launch
It was a great day! The winds were a bit light and a rainstorm was brewing out in the Corpus Christi Bay but it was incredible to hear the sounds of water slapping the hull. Up to this point the only sound the boat made was that of a random orbital sander. It sailed like a real boat, not just something put together in the garage. It felt solid and even with my lack of recent sailing experience felt like what I think a sailboat should feel like.
One week later after only one outing I headed down to South Padre Island to begin my sail up the coast 200 miles for the Texas 200.
It's funny there are so many things that have forced me out of my comfort zone on this build. One is paint finish. It came out pretty good in some areas, others still need a bit of work. Electronics was another of my weak areas. This is where I exceeded my expectations. The electronics came out great. Everything works great and is wired properly. Cabin lights, GPS with transducer, navigation lights, stereo with powered antenna, master switch, solar panel, USB ports for charging my phone, and a cigarette lighter port for other charging, and a fused switch panel, all worked perfect! I learned about busbars and proper connections all through youtube videos. It is amazing the power of the internet. The rigging went smoothly too. It is funny how everything makes sense when you have to put it together yourself. The Texas 200 was just another thing out of my comfort zone I had to do.
For the longest time during the build, I wanted to go with a bright finish on the upper panels. For weeks I carefully and painstakingly took care of the plywood wood veneer on the upper portions above the rub rails. Well it just didn't look like what I wanted so on went the Hateris white paint. The paint scheme pretty much resembles the prototype with the dark blue boot stripe and the white on top. A lot of pocketships have used this color combination for good reason. It looks good! Not real original but it looks similar to the boat I fell in love with in the 2008 or so CLC catalogue.
I did half of the Texas 200 and decided to call it enough and tapped out. There were some things that I needed to change or I should say add or tweak on Candy-O. One of the most pressing changes is the need for seat cushions. Eight hours of sitting on a hard wood/fiberglass cockpit deck in a pair of pants with one of those bathing suit liner things grinding into your skin like a cheese grater gets old.
Another tweak would be a problem I had with the wire supports that go to the top of the mast. These tighten with turnbuckles that I purchased from West Marine. When I first installed them they looked to be the perfect length but when I added the 3/4" block at the base of the tabernacle, to get the tension they bottomed out. The tension was good but not great. With the problems some of the other builders have had cracking their cabins, I was really concerned. It is an easy fix at home.
Soloing the Texas 200 is a bit difficult when it comes to doing little things like changing the radio station, getting a drink, landing the boat, you know, important stuff. The radio will have a remote that can be operated from the cockpit. A small ice chest will accompany me within arms reach too.
An umbrella or some type of binimi will be considered too. Man, it was hot!
 |
Before I punted on the bright finish on the uppers. |
 |
| Would have been easier if I had decided to paint earlier...much easier! |
 |
| This is one of those extreme pucker times, but all went smoothly. |
 |
| One of the last jobs! |
 |
| Raising the main for the first time! |
 |
| Electronics worked great! |
 |
| Maiden voyage! |
 |
| Another from the maiden voyage with Chris, the best J-29 skipper ever! |
 |
| Made it to the Texas 200 in South Padre. |
 |
| From the Texas 200. |
 |
| Shot from Candy-O in the Land Cut- Texas 200. |
 |
| Dinner on Candy-O while camping in the Land Cut. Yumm! |
 |
| Nice shot of my Burka. The sun was intense |
 |
| Shot of the fleet. There were 91 or so in all. Candy-O is the one on the far left with the dark sail. |
Friday, April 24, 2015
Flippin' Party the Sequel !!
There is a sense of urgency to get this beast done. The Texas 200 is nearing and I need to get this boat dialed in before June 6.
Since my last post (the first flip) I epoxied and glass the entire hull, sanded, painted the hull, painted the hard to reach place inside with the boat was upside down, built the mast and spars, the tabernacle, decided on the name of the boat, built a boom gallow and did a bit of varnishing. Yep, busy!
Really the only things left on the boat are things I am really not very proficient. I have woodworking down, my fiberglassing techniques have improved to a point that I can put them in the strong column and sanding is a well practiced skill where I am pretty solid. Painting, electrical, and rigging are three areas that I lack either experience or much skill. Well, thats all that is left for the most part.
I read a great article on painting. It pretty much said keep stacking on coats as good as you can and eventually you will get one you like and can stop...that's about four or five coats for me usually. That works. The hull paint came out close to acceptable. The flipping' crew was complimentary of the paint job...well, they are really nice people.
I was not real happy with the paint on the hull, and figured I had nothing to lose, I took out some 1200 grit paper and wet sanded the Interlux bright side paint. It leveled out nicely with the sanding but of course was now very dull. Took out the buffer and polishing compound and went to town and bam! The gloss was back. I was happy enough with the test area that I hand sanded the entire bootstripe area. It is now acceptable enough.
The bottom I painted with Trilux 33. It has some antifouling qualities. If I had it to do over I would not have used this stuff. The boat will live on a trailer and it is really difficult to get this paint smooth.
 |
| Flipped over! |
 |
| Transom glass. Last big fiberglass job left! |
 |
| Lasers are essential for getting the water line right. |
I used a laser for taping the water line stripe. The laser goes around corners and depending on the location and angle of the hull of the stripe width changes, but as viewed from the side looks like a consistent width.
 |
| The stripe changing width is most noticeable at the stern. |
Initially I painted the stripe white and gold, but the gold paint had no gloss as advertised on the the can. Oh well, I like the red better anyway.
 |
| The blue boot stripe is reminiscent of the Pocketship prototype. |
From the first time I saw the Pocketship in the CLC catalog sometime around 2008 I really liked the dark blue boot stripe. I followed the tradition as have many other Pocketship builders and also went with the blue.
 |
Centerboard installation |
The manual suggests no finish on the centerboard. Just a 400 grit sanded finish. Everything else has been right in the manual. I am not going to deviate on this one.
 |
| One of the chores to do while the boat is inverted. |
While upside-down the manual suggests to do some painting on some of the hard to reach and nearly impossible paces to paint inside the cabin. This is underneath the cockpit seating area inside the cabin. Originally I was going to leave the wood bright. I just painted the whole thing white for three reasons, it was much easier, it will be easier to see by reflecting more light and it can't be seen without laying on your back and looking for it.
There are also a couple of additional trapezoidal pieces of plywood that I felt it needed a bit more strength and stiffness. I am glad I did. Now that the boat is turned over and have stood in the cockpit, it feels much more solid and secure.
 |
Glue up of boom gallow. |
To stay busy while waiting to get my flipping crew together, I cut some strips and layer up my boom gallows. It is the same method I used on the tiller what seems like now a long time ago. I went a little thicker with the strips so the scale looked in proportion with the tiller.
 |
| Gallows modification. |
One of the drawbacks of the boom gallows is having weight up high. When I l did the lamination I left the last strip off so that I could drill holes to lighten things up.
 |
| Lots of holes should help the weight. |
In the picture above you can see the dark strip on the right I used to cover the holes.
 |
| These two holes are for lashing the boom down. |
I left room for a notch to hold the boom and a couple of hole for a tie down.
 |
| Hole production |
With all the chips I swept up I figure I saved a lot of weight. Not really sure how much, but it sure made a mess.
 |
| Tiller finish. |
One of the task to stay busy was putting a finish on the tiller. I like how it came out. The boom gallows with hopefully look similar.
 |
| More finishing. |
Thinned the varnish about 5% with mineral spirits and brushed it on. It flows nice.
 |
| Cutting a scarf joint. |
Having three or more tasks going on at once suits my brain pretty well. I also built my spars. In the picture above I am cutting a scarf joint. I cheated a bit. The hand plane was used to tune and get down to the final size. Most of the hogging off of the wood was done with the 6X48 belt sander seen in the background of the picture. I really throws the dust around.
No pictures of the spars yet. Stay tuned I am really pushing hard to make the Texas 200 and still not compromise the quality of the boat.
Thursday, March 26, 2015
We Had a Flippin' Party!
Lots of beer and Cheetos later the Pocketship was doing a great impression of "The Poseidon Adventure ".
Before the flip there was the rub rail project because with out the rub rails there would be nothing to grab onto for the flip. Rub rails are pretty much a week long project. Each rail consist of three pieces and one has to be epoxied in place one at a time. Before the next piece can be installed the epoxy must cure. During the curing times I was able to work on a few other projects...rudder, center board, and the bow sprit.
 |
| The flippin' boat crew. |
 |
| Hot rags! |
I found the best way to bend the last section of rub rail towards the bow where the radius decreases requires a bit of persuasion in the form of hot rags. I put the rags in the bottom of a bucket and poured boiling water on top of the rags. They would not stay hot real long but long enough to easily make the bend.
 |
| One of the projects during the rub rail installation. |
Built the rudder while the epoxy cured. The tiller was the first thing I built. It was done before the kit arrived.
 |
| Another "stay busy" project. |
The center board has been close to being finished for quite some time. It has been sitting in the corner with the two halves glued together but not shaped and no fiberglass. It was a fun item to have to work on waiting on the rub rails.
 |
| Hole for bow sprit. |
 |
| Cut off from the bowsprit being useful. |
 |
| The shop sure looks different now. |
Everything looked good on the bottom of the boat. It had been a long time since I had seen the keel.
 |
| Bottom side of the rub rails. |
Each strip of the rub rails gets progressively shorter. On top each strip is situated flush with each other. On the bottom it becomes stair stepped. This is so the underside has a nice taper. When the boat is upside down it is the best time to shape the underside of the rail. I used a belt sander. My belt sander is really loud and puts out a lot of dust.
 |
| After the belt sanding. |
 |
| Fairing compound to the rescue. |
I found a slight dip on both sides right at the finger joints. Jamestown Distributors fairing compound is an excellent product. It can be used on wood or fiberglass. I prefer to get it on the wood and cover it with fiberglass. I also use it on my fillets. It has a good working time but still can be sanded after a few hours.
 |
| Festool is nice! |
Before I started this project I invested in some Festool product. I know the stuff cost 3 times as much as anything else on the market but I have been extremely happy with their products. Yes I am turning into a fanboy.
 |
| Takes a lot of glass. |
 |
| After the wet out. |
 |
| ...and below...or is that above? |
 |
| Extra protection. |
The boat will be used in this year's Texas 200 (hopefully). The 200 requires several nights of overnight camping and beaching of the boat. I have four layers of fiberglass from the bow all the way to the front of the keel. Hope it is enough to keep from grinding through to the wood from the abrasion of a sandy beach.
 |
| Finished off at the keel. |
This is the last major part of fiberglass left on the project. I think after all of the epoxy application I am finally getting pretty good at it...well good enough.
 |
| Done...almost. |
My paint comes in today. A bit more touch up on the sanding and I'll start taping off for paint. After the paint I'll have another "flippin' party"!
Subscribe to:
Comments (Atom)