Monday, December 1, 2014

This is Really Getting Fun!

Every minute has been enjoyable working on this boat, but since I started working on the topsides the fun factor has increased exponentially.  I have mostly a woodworking background before I built a couple of kayaks and started this boat.  It is nice to be back in my comfort zone of cutting and shaping wood.

This is an old picture framing trick to get the gales to match up perfectly.

The manual calls them cockpit shear strips.  The strip continues past the cockpit all the way to the bow where they bend together and meet.  To get the angle right where they meet I used a picture frame trick.  Get them close and saw where the two strip meet.  The kerf of the saw takes out just the right amount of both pieces to leave a perfect fit.  

The strips need to be installed proud of the plywood sides.  This is especially critical in the cabin portion of the strip.  After the epoxy cures there will be enough wood to create the bevel to match the angle of the cabin roof, otherwise there will be an unsightly gap between the roof and strip.  I continued the bevel all the way to the point of the bow making the angle flatter the farther forward until they met at the bow.  I did this because there are mooring guides that mount on top of these strips and if the strips had too much angle the guides would not work properly.  I also didn't want these strips flat because the angle has a lovely look of elegance.


Checking the bevel to match on both sides.

Every three inches from the bow to the cabin I made a small cut on the inside of the rails.  This made the bending much easier where the bending angle becomes steeper. The cuts will be filled and the wood will be finished with paint.  The consistent spacing of the kerfs made the curve fair.  I could have set up a steam box but I was just too lazy.

The anchor well has become a great tool tray.
Dry fit of the upper breasthook.
View of the shear strip in the cabin area left proud of the plywood sides.   I thought the curly cut looked cool too.
Installed stringers for the seatbacks.  The hole is for a speaker.


The Pocketship manual is great but it really understates the difficulty of the making of the cabin cleats.  What you have is a strip of wood that has two compound angles on the ends and oh yeah, it has to be perfect in length too.  On bulkhead two (the front of the cabin) there is a rolling bevel that needs to be cut on the top of the curved cleat.  This is really not too bad because it can be done after the cleat is epoxied in place.  The underside is square to the bulkhead.  The cleats on the aft cabin wall (bulkhead 3) are not so lucky.  There is another rolling bevel that must be cut on the underside.

In picture below you can see my method of cutting these strips.  I found it fairly easy to make one end fit with one compound angle so I would cut one and then the other without any worry about length.  I then clamped the two pieces in place and screwed a "splint" to hold them together in exactly the orientation and length.  Then I used the result for a pattern.  It was a method I came up with myself and there are probably some trim carpenters who daily install crown molding laughing at me right now, but it worked for me.

Two strips with their compound cuts clamped in place.

Two strips with their "splint" creating a perfect pattern for cutting the real one.
Tight fit!  Bevel work on top will be done after the epoxy cures.


This is the rolling bevel on the underside of the rear cleat.

Closer look at the bevel angle.

This Lie-Neilson spoke shave is the greatest tool ever.  The marks show where I have been on top and where I am going on the end.

After many dry fits it was time to butter up with epoxy and put on the squeeze.

Wednesday, November 19, 2014

Much More to Show this Time

When building a stitch and glue boat there are times when very little work result in huge transformations .  It has been a while since one of these transformations has taken place.  The last was stitching the hull panels to the keelson and bending the panels together to form the bow.  Epoxying the cockpit deck and footwell in the last post were big but the additions I have made over the weekend are huge and a lot of fun too.


Thar she is!
This weekend the upper panels, bow deck and cabin wall were stitched in place.  It is fun to see the lines and get a real feel for what the boat is going to be like.


Drill press was in the way to back up enough to get the whole boat in the shot.
View from the stern.  Builders take note... the two holes in the cockpit decking make things nice to not only mark the cleats for locating the screw holes but also allow you to reach your hand in for squeeze out clean up.  The holes will be much bigger when the holes for the hatches are cut out so there is not much concern about their neatness or exact location.

One of the foam pieces stacked in the bow section for flotation.  The whole section was filled except  for a tunnel slot left so that I will have access for installing the the bow U-bolt.  Also installed the inspection access in bulkhead 1.  This is the backside.
Installed  the inspection plate in the centerboard trunk.  One item I forgot to do before I installed the cockpit deck.  No big deal I just had to lay down on my side underneath the cockpit deck.  It was really quite comfortable.

This is a PVC pipe I picked up at Lowes.  My friends insisted that I have built in cup holders for some reason.  I will use this pipe for a mold.  Somehow I will build in a drain in the bottom that I probably run to the footwell.  I'll have to think about that one a while.

Wooden "washers" used to prevent damage to the plywood when holding down the deck for epoxy.
The little soldiers have don their job.

I found it is good to stay busy when epoxy is curing.  Here I am working on interior dead light trim.  Dead lights are portholes that don't open.  The trim is mahogany.


Tuesday, November 11, 2014

Chipping away...

The progress continues!  Yesterday was one of those days where everything I touched on the boat just made things worse.  It was the old one step forward three steps backward.  Today was much better and maybe I dare say even productive.

Finally everything under the deck that needed to be done to install the cockpit deck has been.  I finally was able to start a new chapter (literally in the manual) and proceed to the upper parts.

One of the tasks I had to complete is what to do about the separation of the foam flotation under the footwell.  There are several schools of thought on how to tackle this area. I almost went with what the original Pocketship bloger  Dave  but instead I went for maximum  volume for storage and protect the foam.

Mostly pictures this post.  Some of them may be only interesting to builders...


Added a seal (wall) in the lazarette.

Covered with fiberglass and epoxy, added a fillet and a bit of bondo to smooth things out.


A different view showing both sides.
Finished product sanded and painted

Footwell sole.
There has been a bit of discussion among Pocketship builders about this footwell being a bit too narrow.  Allegedly the designer is over 6 foot tall but has tiny feet.  My size 12 is a little tight.


Epoxy filled pendent hole.  This is where the line to operate the centerboard will go through.  It is located at the front of the footwell.

Added shims inside the centerboard trunk for the roller that the pendent line will roll on.
Roller installed.

Deadlights came in!!!
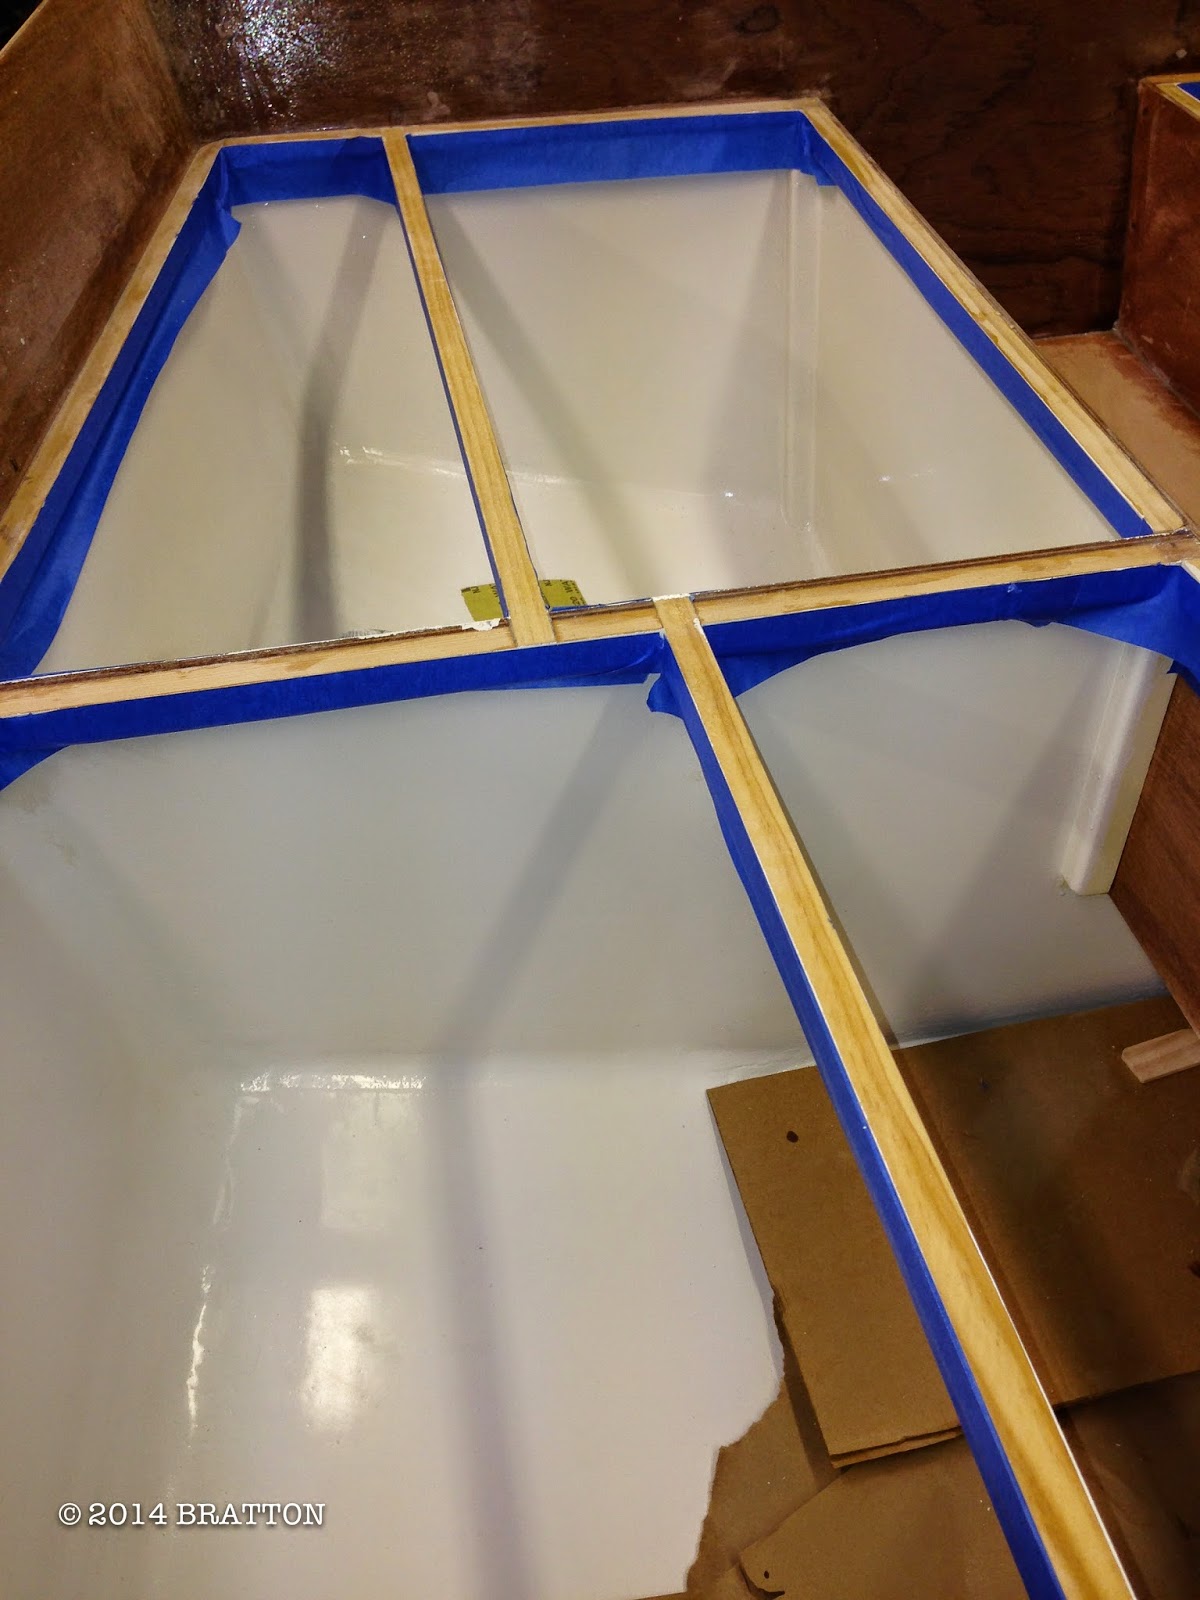
Tip to builders...tape for squeezout.  It is worth the tape and effort.

Also tape the underside of the deck for squeeze out too.


Tape the cleats and underside of the cockpit deck for squeeze out.  After marking the cleat positions it is easy to tape.  I gave myself about an 1/8th of an inch of room on both sides of the lines.  Problem I had was being able to mark the underside in the hatch area without the hole for the hatch making the area sealed.  I cut the hole (can be seen in picture above) where the deck hatch will be cut (but much larger) so I could get my hand and a pencil in to mark the underside.  The hole was also was nice to reach in to scrape squeeze out too.

While waiting for paint or epoxy to dry I have been getting my electronics together and building a dashboard.  More on that next post.
After a lot of fitting the cockpit deck goes on!  Wow I need to clean the shop.
View from underneath.  The squeeze out tape doing its job!

Cockpit deck installed with wooden "washers".


Monday, October 27, 2014

It is not perfect...

Most of the work lately has consisted of sanding.  The sanding has taken it's toll on my left arm and elbow. The tendonitis is only on the left, the right side seems to hold up better.  Rest, ice, elevation, Ibuprofen...however the saying goes, just quit sanding left handed.

The good news is that I have finished with almost all the interior sanding.  Most interior sanding has me working on a concave area so the sanding is somewhat confined.  From here on I will be sanding on the outside and on mostly convex surfaces where I will be able to get away with more power sanding and less hand sanding.  As soon as I finish this step everything will be covered in cardboard and newspaper to avoid drips and dings while working on the rest of the boat.  It will be a while before I see my handiwork again.  I will take a lot of pictures.

Breaking down the progress I have made in the last few weeks goes like this, take out all the floorboards, sand and finish them, finish sanding the hull, paint & finish it's surface, and reinstall the finished floor.  Along the way, I builtin speaker boxes that I designed and installed in the front locker between bulkhead 1 and 2.  Also spent some time figuring out the electronics, and did a little more work on the tiller that I laminated before the kit arrived...seems like a long time ago.

Painting (along with electronics) has always been my weak point.  On the kayaks I would prep the surface and have an auto body friend spray for me.   I decided to have a go at it myself this time.  Those pros can make it look so easy...it is not.  It went ok but I found myself recovering from my ineptness with a spray gun with more sanding.  After the second coat I sanded the finish with 320 until I had a nice dull level surface.  Just for an experiment I sanded an area with 800 grit and then hit it with my power polisher.  The result was a really nice glossy finish.  I figured it was not going to get any better so I finished off the rest of the hull.

I strive for perfection but there is always a point when you have to say "good enough"or the project will never get finished.  I know where the mistakes are but I have learned over the years to just not point them out and it is very rare that they are ever discovered.  It is not perfect but it is done!


Bilge primed sanded and ready for a top coat of paint.


Locker near the bow with fabricated speaker boxes in the corners and mounts for the battery down below.  The hole in the center is an inspection port.

Locker after a coat of paint.
Bilge after first coat.

After some polish.


Floor finished and reinstalled.
Another view of the sole without the lift out sections installed.  The lift outs will conceal the lead  ballast.
Overview of the project.

Monday, September 29, 2014

The French have a Different Word for Everything...

I once ran a radio station while going to college.  It was a small radio station.  We had about 8 people working there when I started.  Shortly after I was hired the station was bought out and everyone was let go except me.  I think it was I worked the cheapest.  Anyway to make a long story short I was on my own and was pretty much self taught in radio.  About a year later the station sold again to some real radio people in a town about 45-55 minutes down the road.  Most of my interaction was on the phone with them because they didn't like to drive.  Being self taught, my terminology I used was looked down upon by the "real radio" guys.  I used to refer to commercials as "ads". This turned out to be a real faux pas.  Turns out you don't call an advertisement an "ad" in the business.  An "add" is a new song in the music rotation.  An advertisement is called a "spot" usually 30 or 60 seconds long. oh well, who knew?

Well I tell this story because like radio I am self taught when it comes to building boats and don't have a lot of interaction with guys that know their stuff.  So I finished the installation of the floorboards.  I believe this is called the sole.  Hope "real boat people" don't laugh at me.  There are a bunch of other terms like lazarette, Bomar, companionway, tabernacle, gaff, gudgeons & pintles, that I will be working into future posts...hope I don't misuse them.  Boat people are like radio people and the French...they have a different word for everything.
Installed floorboards.
Trim line drawn using a wood strip left over from one of the kayaks to draw the line.
Tight quarters required a tool purchase.
Aerial view.
Implements of construction.
My "feeler gauge".
Everyone seems to have found their own way of installing the floorboards.  I found using cheap drywall screws for the first installation would be a good idea so not to tear up the bronze screw heads.  Ultimately after the boards are sanded rounded over with the router and varnished they will be installed with bronze screws.  The piece of paper I used in the last picture was used kinda like a feeler gauge.  I would slide it under the floorboard and found where it would make contact with the hull.  I would then sand or hand plane that area.  After lots of back and forth the clearance was perfect.

Also in the last picture the floorboard second from the bottom is flat sawn.  All the rest of the boards are quarter sawn.  OCD and being a woodworker this drives me nuts.  All the boards have perfectly straight grain with the very close tight grain, except that one with Cathedral grain...aaaaaaawwww.

While installing the floorboards here is a tip for future builders.  As you work your way out from the center it is very difficult to reach your hand under the installed boards once you get a few boards installed. It is also really easy to drop stuff during installation and when you do they all slide or roll to the center on the hull, just out of reach.  I just took the floorboards out for finish work and exposed enough stuff to build another boat!  Drill bits, screws, screw drivers, shims and lots of pencils.  It was like opening a treasure chest.  Have plenty of these things on hand before you start.

It was a nice change of pace from all the sanding doing the floorboards but now that they are out, back to sanding.


Tuesday, September 23, 2014

Change of Pace...

It sure is nice building one of these boats with all the Pocketship blogs out in cyberland.  Before starting the build and waiting for the kit to arrive I read every one of them I could Google up.  Now every time I start a new step I hunt down the blogs again and check their posts to see how the other guys did the same step.  It is kind of like looking at some else's paper on a test.  There are such great ideas for things not covered in the manual from brands of paint, to building techniques, and electronics.  Yep, I am going to rip off a few answers and give credit along the way of course and hopefully throw a few things out there others can rip off from me.

Up to this point everything is mostly as the manual has instructed.  The guys on the forum did talk me into leaving the cleats off the bulkheads until after the epoxy and fiberglass is done in the hull for ease of sanding.  Thanks guys!  Done.

Another deviation from the manual was an idea of my own.  Bulkhead 2 is turned around in my Pocketship.  That way the large hole is on the left and the small hole is on the right.  I did this for several reasons.  The electronic equipment that is normally mounted over the small hole will be on the right where I think it would be more conveniently located, and as noted in a previous post, I am right handed.  Also, the veneer on the wood looked much better on the side that will be now facing the companionway instead of the locker in case I plan to leave the finish bright (natural).

Today I started the floorboards.  I just was too tired of sanding and figured I needed a change of pace.  It really is nice to getting back to something that is more like woodworking.  The first couple of boards are going in nicely and look great. After all the boards are fitted they will be numbered and taken out for finishing, then back to sanding the hull for it's finish.  Hopefully by left arm will recuperate when that time comes.

Floorboards mostly just laying on the bulkheads earlier today...

Another deviation from the manual is the use of a little Bondo you can see on bulkhead 4 (the spots where it looks like a seagull pooped) It is not structural, just to smooth up my bad fillet technique.  It really is easy to sand and hardens quickly.  There are a few more places I plan to apply it when the floorboards come out.   Once painted no one will ever know.

Even tho the bulkheads are under the floorboards and they won't be seen, I want a smooth finish for cleaning purposes. Well, that and I will know what is under there.

I am still having a blast building this boat.  I hope sailing it is as much fun!

Tuesday, September 16, 2014

Progress Continues!

I have put hours and hours into the boat and made a lot of progress but not much to show.  Now that all the fillets are done in the bilge, I have acquired the skills and know how to do a pretty good job...a little late now.  The nice thing about fillets and fiberglass, is that if you are not particularly proficient you can always recover, if sanding does not bother you.  I have done a lot of sanding and have a lot to go...

There are times when I look at my work and think, "wow... this is not looking so good".  I remember feeling that way a lot when building my kayaks but in the end I was happy with the results.

This was my first attempt a large fiberglass job on my first boat.

Kayaks are fun but I am ready to harness some wind and leave the paddle at home.

Another picture to prove it floats!

I may not look like much but there are many hours of work from the last pictures of the Pocketship  and this picture below.  It is in the "ugly stage" for sure, but I am happy with the way things are turning out so far.  This area will be under the floorboards and will not be seen.

The bilge before a couple of fill coats of epoxy and more hours of sanding.

Before wetting out the fiberglass cloth with resin in the locker area.


Future Pocketship builders, note the clamps holding the cleat on bulkhead 7.  It is there just temporarily without glue to protect the fragile bulkhead.

I guess I need a complaint section in this post so here it is...my left are is killing me.   I find myself in all kinds of contorted positions  to the sanding of the bulkheads and fillets.  Many times I find I must sanding left handed.  This is really not a problem, my sister is left handed and I believe I may harbor some of these tendencies myself, but I guess the muscles and tendons are not up to the abuse.  Another problem I have is after I climb into the bilge to do some work I always forget at least one tool or the power tool I about to use is not plugged in.  Climbing in and out is not easy.  Ok, the complaint department is closed...

Only one more small area to glass and then work on the soul (floorboards) will begin.  I have been looking forward to doing the the next stage of construction since before I received the kit and I all I had was Pocketship blogs on the interweb to read.

The blogs I have read have been invaluable in inspiration, motivation and great information for the build.  The consensus of the blogs seems to be that I am about to complete the most dreaded parts of the build.  If this is the worst, bring on the rest of the construction!  I am having a blast and have loved every step along the way.