Thursday, March 26, 2015

We Had a Flippin' Party!

One of the big milestones in building a Pocketship is when the boat is first flipped over to do the bottom work.  To do this requires friends.  Pocketships can become so consuming that friends could be a little hard to cultivate, but fortunately for me I still have a few.  Great friends that like boats in fact.  These are the captains and crew of Stoopid Monkey a J-29, and great boat flippers they are!

Lots of beer and Cheetos later the Pocketship was doing a great impression of "The Poseidon Adventure ".

Before the flip there was the rub rail project because with out the rub rails there would be nothing to grab onto for the flip.  Rub rails are pretty much a week long project.  Each rail consist of three pieces  and one has to be epoxied in place one at a time.   Before the next piece can be installed the epoxy must cure.  During the curing times I was able to work on a few other projects...rudder, center board, and the bow sprit.

The flippin' boat crew.


Hot rags!

I found the best way to bend the last section of rub rail towards the bow where the radius decreases requires a bit of persuasion in the form of hot rags.  I put the rags in the bottom of a bucket and poured boiling water on top of the rags.  They would not stay hot real long but long enough to easily make the bend.

One of the projects during the rub rail installation.

Built the rudder while the epoxy cured.  The tiller was the first thing I built.  It was done before the kit arrived.

Another "stay busy" project.

The center board has been close to being finished for quite some time.  It has been sitting in the corner with the two halves glued together but not shaped and no fiberglass.  It was a fun item to have to work on waiting on the rub rails.

Hole for bow sprit.
Cutting the hole in the bow for the bow sprit was a bit unnerving.  I prefer to sneak up on the fit...it is still a bit too tight.  I used a section of the cutoff from the bow sprit stock for fitting to get the size just right.

Cut off from the bowsprit being useful.

The shop sure looks different now.

Everything looked good on the bottom of the boat.  It had been a long time since I had seen the keel.

Bottom side of the rub rails.

Each strip of the rub rails gets progressively shorter.  On top each strip is situated flush with each other.  On the bottom it becomes stair stepped.  This is so the underside has a nice taper.  When the boat is upside down it is the best time to shape the underside of the rail.  I used a belt sander.   My belt sander is really loud and puts out a lot of dust. 

After the belt sanding.


Fairing compound to the rescue.

I found a slight dip on both sides right at the finger joints.  Jamestown Distributors fairing compound is an excellent product.  It can be used on wood or fiberglass.  I prefer to get it on the wood and cover it with fiberglass.  I also use it on my fillets.  It has a good working time but still can be sanded after a few hours.

Festool is nice!

Before I started this project I invested in some Festool product.  I know the stuff cost 3 times as much as anything else on the market but I have been extremely happy with their products.  Yes I am turning into a fanboy.

Takes a lot of glass.


After the wet out.

...and below...or is that above?

Extra protection.

The boat will be used in this year's Texas 200 (hopefully).  The 200 requires several nights of overnight camping and beaching of the boat.  I have four layers of fiberglass from the bow all the way to the front of the keel.  Hope it is enough to keep from grinding through to the wood from the abrasion of a sandy beach.

Finished off at the keel.

This is the last major part of fiberglass left on the project.  I think after all of the epoxy application I am finally getting pretty good at it...well good enough.

Done...almost.


My paint comes in today.  A bit more touch up on the sanding and I'll start taping off for paint.  After the paint I'll have another "flippin' party"!


Thursday, March 5, 2015

Where Did February Go?

Ooops, I skipped February!  No updates last month but at least the month was short.  Here are my excuses...got sick (two weeks of no boat building), my daughter's basketball team went deep into the playoffs, snuck in a ski trip, general laziness, and when not dealing with all the aforementioned I have been working on the boat.

Before this weekend I was getting a little discouraged about making it to the Texas 200 with my new Pocketship.  It has been my goal to have this thing in the water at least 6 weeks before the start of the 200. It starts June 8, 2015.  I am typing this on March 4.  Holy smokes where does the time go?  The good news is the progress has rally taken off the last three days.  The companionway hatch woodwork has been done, the entire topside has been glassed and epoxy filled, sanding the topsides is about 50% done, work on the rudder has started, and the rub rails are halfway installed.  The boat should be ready to flip next week for the work on the underside of the hull.

One of the biggest obstacles to getting this beast done before the Texas 200 is all the electronics I have planed (and bought) to install.  Cool stuff like a stereo that will bluetooth to my phone, a depth finder, interior lights, exterior navigation lights, volt meter, master switch, Garmin GPS, well you get the idea a bunch of stuff.  Unfortunately electronics is not one of my fortes.  Then there are spars, a mast, boom gallows, find a trailer, rigging and a lot of painting.  Good thing is it is all fun!

I had a case of "cut it twice and still too short" in the building of the bow sprit.  Looking at the plans I thought the cross section dimensions were 2X3.  Turned out it was 2 1/2 X 3.  There are no really good sources in my town (that I have found) for sitka spruce.  The wood is great for boat builders, strong and light with long straight grain and no knots.  Works great for spars and masts. Turns out a trip to San Antonio for a girls basketball playoff game was also a location of a great wood store.  Told the guy what I wanted, and being the knowledgeable wood guy, he was asked if I was building a boat.

Building the hood for the companionway has been a nice departure from the "epoxy mud pies" and never ending sanding.  This woodworking is a bit different because like the entire boat, a 90 degree angle is rare.  This hood has compound angles on curved edges. It enough to make your head explode at times.  Somehow I got through it.  My high school geometry teacher Mr. Morrison would be proud.  We used to shorten his name to "Moe" because of his haircut looked like Moe from the three stooges, but I am getting a little off the subject.

Speaking of getting off the subject, this boat project is perfect for the attention deficit problems that I very frequently suffer from.  Lately I have been bouncing around with three or four projects going at once.  This is really necessary because as soon as I put epoxy on a part I really can't work on that part for the next few hours.  Currently I am working on the rudder, companionway cover, bow sprit, and rub rails. Works for me.

Another one of those acute or oblique angles...I can't remember which is which.

Router table makes a good workbench.  Every horizontal surface in the shop seems to be full.

Built that router table a long time ago and never used it much until now.  It gets a pretty good work out on this project.
Plug manufacturing for the hood screw holes.
Plugs inserted.

Had some left over bronze screws from the cabin sole floorboard.  I can find a lot of places to use the extras before this project is over.
Plugs flush cut.

Hood in place.
I did the sides in mahogany and plan to leave them with a bright (clear) finish.  I avoided screw holes in the tops by using clamps and glue during assembly. The plywood in the kit is oversized so alignment is easy.  Get it close and trim the overhang.

Found another horizontal surface in the shop not being used...the table saw another great workbench!
One of the roof supports.


I noticed a slight sag in the cabin roof when checking the fit of the companionway hood.  It was not much, maybe a 1/4".  I hated to epoxy and fiberglass with the sag.  Instead I added the temporary braces to straighten things out before glassing the top.

One of those measure 900 times, cut one moments.  These holes are for the storage hatches.

One of the things my dad did was never throw anything away.  Guess that happens when you grow up in the depression.  This asset/curse was handed down to me.  He didn't sell things very often either.  I am really grateful for this.  The 1940's Delta planer works like it did when it was new in his lumber yard he owned after getting back from WWII.  It sure is cheaper to buy rough lumber...
Dimensioning sitka spruce for attempt #2 on the bow sprit.
Quiet machine too!  I can have a conversation while it is in use.  Try that with one of those lunch box planers that are now in vogue.

It smells good too.
First strip of three pieces on the rub rail.
Second strip.


That pretty much catches up with the progress except for some rudder pictures.  Until next time!


Friday, January 23, 2015

Six months to Go!

First post from the Pocketship Yard in 2015.  Happy new year!

The holidays have slowed the progress down a bit in the shipyard but progress has been made.  A quick list of the progress would include the sealing of the seat backs, fillets in the cockpit, painting of the interior of the cabin, fitting of the cabin roof, finishing of the transom skirt.

Today and yesterday have been really productive.  I started sheathing the topsides with epoxy and fiberglass.  In the last two days I have covered almost the entire cockpit with fiberglass cloth, including the footwell, seat backs and upper outboard sides.  While waiting for the epoxy to kick I did some more work to the anchor well at the bow and installed the cabin roof.

Installing the cabin roof requires a lot of getting in and out of the boat.  It seems no matter how many tools or supplies you take climbing in there is always that one item just out of reach that needs to be retrieved with another climb out of the boat.  The rear cabin wall during construction has a brace across the top of the companionway  to keep everything square and lined up.  This compounds the problem of getting in and out of the cabin.  There is a small hole to climb through every trip. the hole seems smaller every time I go through it.  Now that the epoxy on the roof is curing I will get to cut that temporary piece out very shortly!

On one of my trips today climbing out I slipped and fell.  Wow that hurt.  I limped around for about ten or fifteen minutes and noticed a pretty good mark on my leg.  I think I am going to feel that one for the next few days.  I suggest to all future pocketship builders to buy a nice 4 foot ladder early in the build.  A chair is not always stable enough when you stand on the armrest. Also on the injury report, the elbow that I have developed tendonitis feels a bit better but far from 100%.  My pediatrist friend suggested one of those wrap thingamujigs.  Foot, elbow, close enough, it seems to help a bit.

The tittle of this post is "Six Months to Go".  In six months the Texas 200 will start. http://www.texas200.com  I plan to sail the pocketship in the 2015 edition.  To do this I would really like to have been on the water for at least a month or so dialing in the setup.  I can do this!

Cockpit sheathing.  The bottom right side of the picture you can see the cabin roof just peering into the picture.  It s still oversized and will be neatly cutoff when the epoxy cures.
 In the picture you can see a lot of green faring compound around the fillets and a couple of large spots in the footwell sides.  This stuff is great.  It looks a bit messy but it makes the fillets perfect when it comes to applying the glass over them.  I found some fairing compound from Jamestown Distributors I really like.  It is their house brand.  It mixes 50/50.  One blue and one yellow portion.  Mix it up and when the stuff all turns green you are ready to use it.  Here is a link TotalBoat  .  Nice stuff!


Cabin roof temporally held in place with drywall screws and blocks.


Cockpit 'glass.  The two holes were so I could reach in and scrape off squeeze out when glueing the deck down.  After that they serve as a great place to lose tools and supplies.  More visible fairing compound for my less than perfect fillets. And that pesky temporary piece across the companionway.
The area on the cockpit in the picture above that has no fiberglass sheathing yet will receive two maybe 3 layers.  From reading blogs it seems to be a weak spot.  I have all ready beefed up of the cabin wall from the interior with a strip of 3/8" plywood about 2 1/2" wide.  Stepping on that front corner of the cockpit, things look a little weak.  I did glass the underside of these cockpit panels for additional strength.  Glad I did now.

Another view of the cockpit.
The tape works nice for leaving a really nice clean edge.
Before the wet out.
Interior paint after the first coat.  It is going to need a couple of more.
looking out of the companionway.  The 3/8" of plywood is across the bottom of the picture was epoxied across the bottom edge just above the centerboard for much needed additional strength.
Dry fit of the cabin roof.  The blue tape on the upper hull is to protect the wood from spills and dings.  I plan to leave this section bright (natural wood).  If it gets beat up and does not look good Ill just paint it.
Won't be long and I will have a "big flipping party" to turn the boat over to work on the hull.  It needs to come soon, the shop needs a good cleaning.

Saturday, December 27, 2014

The Creek is Rising!!!

The progress has been steady in the Shipyard since the last post.  The anchor well at the bow of the ship has fiberglass and the breasthook installed.  The Dorade boxes have been built and installed in the actor well area and decisions have been made concerning electronics and how to route wires. I also fitted the transom skirt.   It seems a majority of the time I have been coating surfaces with epoxy.  Every square inch of wood on this boat, inside and out,  has been slathered with multiple coats.  I think I may get carpal tunnel from all the stirring of the epoxy.


Laying up the cloth in the anchor well.


Inside of the starboard dorade box in the anchor well.  The timber epoxied on the inside is backing for a mooring cleat.

A lot of the work has gone into the seat backs.  Lots of framing, sealing with epoxy, and hand planing.  Once the framing was built, the tops of the seat backs needed backers for the jib blocks to screw into. Kinda like a 2X4 for a towel bar behind the sheetrock in a bathroom.  Massive ten inch long pieces of timber are epoxied in place to give the screws something to hang on to.  Same thing at the aft end, but with a shorter 6 inch block for the mooring cleat and boom gallows.  These blocks really make things feel solid.

The backing for the screws that will hold the jib blocks. On top of the transom the skirt can be seen.
 The aft end with the shorter backers for the mooring cleat and boom gallows.


The forward area of the seat backs are filled with foam for safety flotation.  The aft end of the seat backs have a little storage compartment.  There are two different schools of thought of how to fill the seat backs with foam flotation.  One method is to build everything but the leave off the cap of the top so that a mixture can be poured into the top that chemically reacts and turns into foam that takes on the perfect shape of the interior of the seat back with no voids.  That sounds really cool to me and a lot of fun!  The other is to cut foam insulation in little pieces and stack them inside the open area.

Well I had bought the stuff at the start of the build and never gotten up the nerve to  use the stuff yet.  I had read on other pocketship blogs about how great it was and how it can cause a mess. I was prepared! I looked for some technical data on the stuff and could not find anything, but who am I to read directions anyway.   I had all my hazmat gear on and a plan of execution.  I even tested a sample to see how much time I had for the reaction (not long according to my tests).

Looks like serious stuff.
The first pour went really well.  I mixed up about a quart of the stuff and quickly poured it in the seat back without spilling a drop.  The reaction was taking place creating a bit of heat and began to fill the compartment.  It was kinda like bread rising, except I was wearing a respirator, rubber gloves, safety glasses...well it looked like fresh rising bread.

See it does look like bread.

I was really happy with the stuff and continued on to round two of the pour.  I figured I was getting pretty close to the top, so I went with a much smaller batch to fill the rest of the area.  Well not small enough.  Turned out the first batch was not finished rising and the second batch was a bit bigger than it should have been (ok more than a bit).  Things changed from a scene in a lovely bakery into horror scene from "The Blob" very quickly.  I had huge gobs of foam overflowing over the sides with volcanic ferosity (ok not that bad but it just kept coming!).  It was spilling inside to the cockpit and overboard down the side on onto the floor but not before covering my shoes first.  I decided that spilling overboard was the lesser of two evils and pushed the emerging mess with a 14" 1X4 away from the cockpit.  At this point I was really regretting my decision to use this toxic blend of horror.  Having not swept my floors in a while,  the mess was compounded by all the wood shavings created by my hand plane.  With the foam coating the bottoms of my shoes, these curly shavings were now stuck to the bottom of shoes because not only is this stuff toxic, it is sticky too.  Now that the goo has hardened this compound of shavings and hardened foam has become one with my shoe soles.

Finally the chemical reaction subsided and I was left with a pretty good mess.


After the reaction stopped.

Looks like the boat got sick.


You may notice the blue tape in the pictures.  I put the blue tape on the are that I plan to leave bright when I finish the boat.  I figured if I keep it covered it will lessen the chance of epoxy spills and whatever from keeping the wood from looking uniform once the varnish goes on.  Well it paid off for this episode.

Now for the upside of this event.  Everything came out fine.  The floor scraped up clean without too much effort and the foam leveled off nicely and looks great.  I am really happy with the results.

Cleaned up nice!
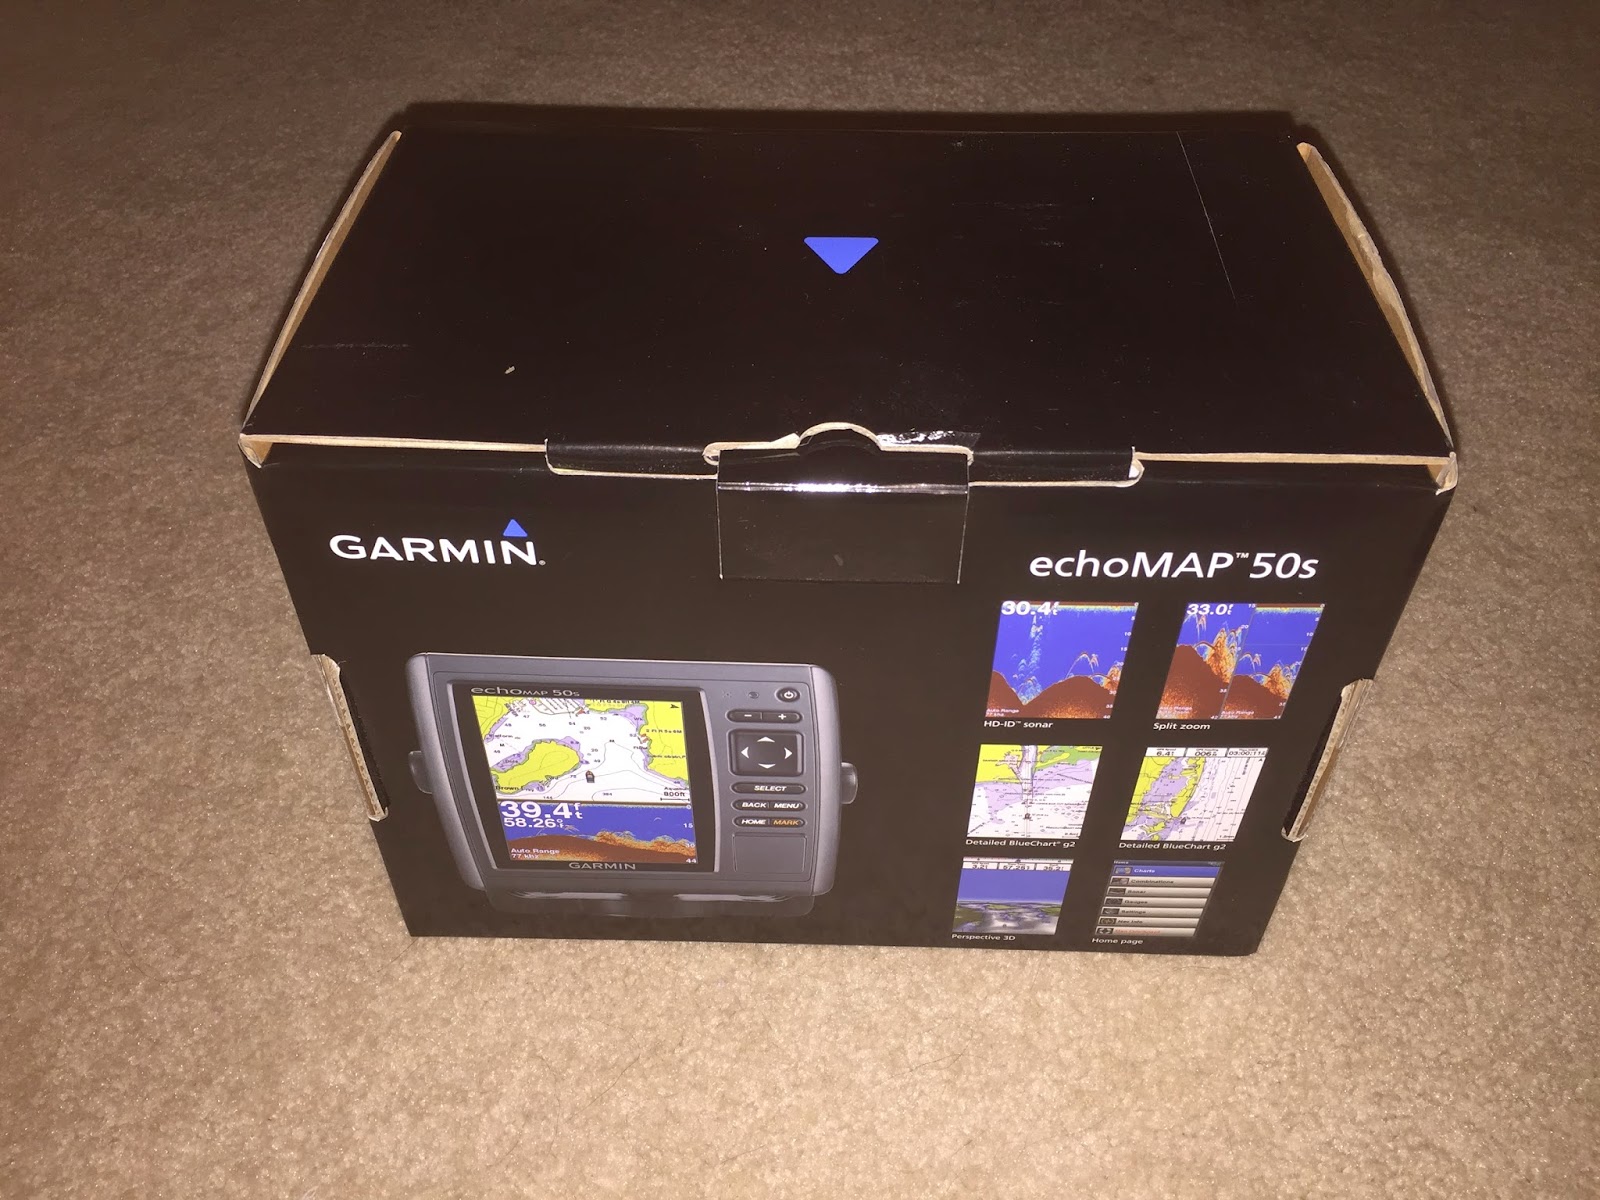

On the starboard side I decided to go the route that the manual endorses ... i.e. cut foam.  I did this not because I was afraid of the expanding stuff (hell, I was on my way of master of the product) but because of some wiring and conduit I installed on the starboard side.  I cut piece after piece of foam insulation until I filled the void.  Not nearly as much fun, and none of the trauma, but done none the less.  I epoxied on the seat back over the foam and called it a night.

All filled up.

Santa brought some electronics.  More on that later...